Pink Fire Pointer October 2013


Apple Revealed Ipad Mini 2 With A7 Chip & Retina Display


Apple unveiled its latest addition to its Ipad Mini series in the shape of Ipad Mini 2 with 7.9inches of Retina Display with mighty A7 64bit processor along coprocessor M7.

Display

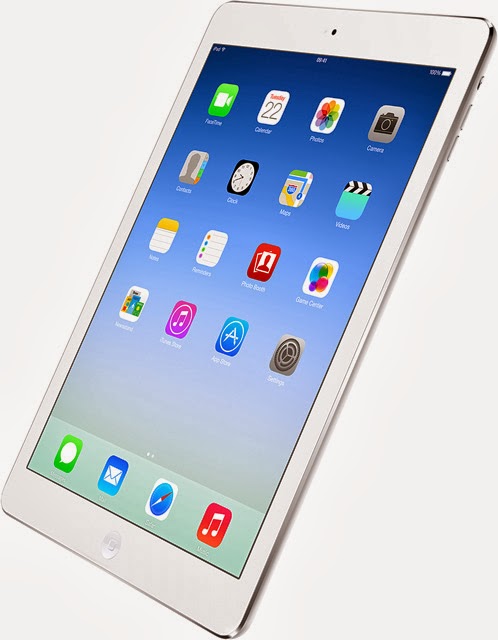
Ipad Air packs 7.9inches Retin  (diagonal) LED-backlit Multi‑Touch display with IPS technology supporting a resolution of 2048x1536 with 326 pixels per inch (ppi). This is double the resolution and pixels per inch of its predecessor (Ipad Mini) display . Its interesting to see that Ipad Mini 2 packs more pixels per inch as compared to newly launched Ipad Air by apple, even though its 1.5 inches smaller in screen size.

Hardware:

Ipad Mini 2  is powered with mighty A7 chip which is clocked at Dual core 1.3Ghz cyclone processor with 1gb of ram found on Ipad Air and gives you CPU and graphics performance up to 2 times faster than the A6 chip found on Ipad 4 and Iphone 5. Its magnificent to see that Ipad Mini 2 will give you upto 4 times faster Cpu speed  than Ipad Mini and not even that its also going to give you upto 8 times faster gpu speed as compared to its predecessor. This means now you are upgrading your Ipad 2 with Ipad 5 and this is a drastic change in speed. A7 makes Ipad Mini 2 the first 64-bit Mini tablet in the world with a new M7 coprocessor which is like a sidekick to the A7 chip. M7 is designed specifically to measure motion data from the accelerometer, gyroscope and compass, a task that would normally fall to the A7 chip but because of M7 chip you will also see a less burden on battery. In terms of Ipad Air equipped with PowerVR G6430 which is quad-core graphic chip and runs almost every game like a butter in it like Iphone 5S and Ipad Air.

Design

Ipad Mini 2 have crystalline diamond cuts lines on the sides like Iphone 5, 5s and Ipad Air which are very well fitted on the Ipad by apple. On back of Ipad Air we have anodised 6000 series aluminium — the same material used in Apple notebooks.

Dimension:

Ipad Mini 2 measures 200mm (Height) x 134.7 (Width) x 7.5mm (Thickness) and weighs 331grams (Wifi Model) 341 grams (Wifi +3G Model) in comparison to Ipad Mini measurements of 200mm (Height) x 134.7mm (Width) x 7.2mm (Thickness) and weighs 308grams (Wifi Model) 312grams (Wifi+3G Model). These measurements illustrates that Ipad mini is only .3mm thincker and 19grams lighter  than Ipad Mini, but this is not a big deal specially if we look Ipad Mini 2 specs in comparison to its predecessor.


Software

Ipad Mini 2 integrated with iOS 7 and it is designed to take advantage of 64-bit architecture. So it’s every bit as advanced as the iPad Mini 2 it runs on. And with new features like smarter multitasking, Control Centre and AirDrop, iOS 7 makes the experience of using iPad Air even more beautiful and simple. Because iOS 7 and iPad Air weren’t just designed to work together, they were designed to enhance one another according to Apple.

Internal Memory

Ipad Mini 2 comes up in four types of built-in storage 16gb, 32gb, 64gb and 128gb and all of them price differently, so if you want more built in storage then pay more to get your new Ipad Mini 2 with your desired onboard storage.

Ports

In terms of port Ipad Mini 2 remains the same with home button, lightning connect, one speaker, 3.5mm jack,  dual microphones, silent on and off key . However instead of Micro Sim its now going to take Nano sim the same one we have seen on Iphone 5, 5s.

Connectivity:

In terms of connectivity Ipad Mini 2 comes up with Blutooth, Wifi, LTE.

Battery

Ipad Mini 2 battery remain unchanged and gives you 10 hours of web surfing over Wifi and 9 hours of web surfing over data plan.

Camera

Ipad Mini 2 comes up with a same camera found on Ipad Air  on the front and back. On the front it has 1.2mp Camera and on the back it has 5mp camera.

Final Verdict

To give my final verdict we are going to use a SWOT analysis below

Strength

Ipad Mini 2 packs a considerable beautiful 7.9 inches display with a superior design, strong processor than its predecessor.

Weakness

It doesn’t have too much weaknesses, but at some extent it can be argue why its not equipped with flash light with back camera or why it doesn’t support 8mp snapper.  Another thing people want in their device is storage it has 4 variants in terms of storage, but people have to pay more to get more storage whereas if they have putted the sd card slot in it people can transfer files easily from their pc to Ipad or Ipad to PC.

Opportunity

One of the biggest opportunity Ipad Mini 2 has is its A7 64bit chip with powerfull Gpu to play any game flawlessly in it.


Threats

The biggest threat to Ipad Mini 2 is its own Ipad Air which is launched by Apple and Sony Xperia Z Ultra along with Nexus 7 2013 which is powered with might Snapdragon  processor with 2gb of Ram.

Ipad Mini is expected to fall on shelves on 29th or before end of November with bang.


Apple Unveils Ipad Air (5TH Generation Ipad With A7 Chip)


Apple unveiled its latest addition to its Ipad series in the shape of Ipad Air supposed to be Ipad 5, with 9.7 inches of display and A7 64bit processor with coprocessor M7.

Display

Ipad Air packs 9.7-inch (diagonal) LED-backlit Multi‑Touch display with IPS technology supporting a resolution of 2048x1536 with 264 pixels per inch (ppi). From the display perspective this device remains equivalent to its predecessor Ipad 4.
Hardware:

Ipad Air  is powered with mighty A7 chip which is clocked at Dual core 1.3Ghz cyclone processor with 1gb of ram  and gives you CPU and graphics performance up to 2 times faster than the A6 chip found on Ipad 4 and Iphone 5. A7 makes Ipad Air the first 64-bit tablet  in the world with a new M7 coprocessor which is like a sidekick to the A7 chip. M7 is designed specifically to measure motion data from the accelerometer, gyroscope and compass, a task that would normally fall to the A7 chip but because of M7 chip you will also see a less burden on battery. In terms of Ipad Air equipped with PowerVR G6430 which is quad-core graphic chip and runs almost every game like a butter in it like Iphone 5S

Design

Ipad Airhave crystalline diamond cuts lines on the sides like Iphone 5, 5s and Ipad mini  which are very well fitted on the Ipad by apple. On back of Ipad Air we have anodised 6000 series aluminium — the same material used in Apple notebooks. A good thing you will notice about Ipad Air as compared to its predecessor is its measurements because its 20% thinner and 28% lighter than Ipad 4 and weighs under 0.5kg. Ipad Air measures 240mm (Height) x 169.5 (Width) x 7.99mm (Thickness) and weighs 469 grams (Wifi Model) 478 grams (Wifi +3G Model) in comparison to Ipad 4 measurements of 241.2mm (Height) x 185.7mm (Width) x 8.8mm (Thickness) and weighs 601grams (Wifi Model) 613grams (Wifi+3G Model). These measurements shows that how light and thin new Ipad Air is.


Software

Ipad Air integrated with iOS 7 and it is designed to take advantage of 64-bit architecture. So it’s every bit as advanced as the iPad Air it runs on. And with new features like smarter multitasking, Control Centre and AirDrop, iOS 7 makes the experience of using iPad Air even more beautiful and simple. Because iOS 7 and iPad Air weren’t just designed to work together, they were designed to enhance one another according to Apple.

Internal Memory

Ipad Air comes up in four types of built-in storage 16gb, 32gb, 64gb and 128gb and all of them price differently, so if you want more built in storage then pay more to get your new Ipad Air with your desired onboard storage.

Ports

In terms of port Ipad Air remains the same with home button, lightning connect, one speaker, 3.5mm jack,  dual microphones, silent on and off key . However instead of Micro Sim its now going to take Nano sim the same one we have seen on Iphone 5, 5s.

Connectivity:

In terms of connectivity Ipad Air comes up with Blutooth, Wifi, LTE.

Battery

Ipad Air packed a powerfull 11560 mAh battery like its predecessor that gives you 10 hours of web surfing over Wifi and 9 hours of web surfing over data plan.

Camera

Ipad Air comes up with a same camera found on Ipad 4 on the front and back. On the front it has 1.2mp Camera and on the back it has 5mp camera.

Final Verdict

To give my final verdict we are going to use a SWOT analysis below

Strength

Ipad Air  packs a considerable beautiful 9.4 inches display with a superior design, strong processor than its predecessor.

Weakness
It doesn’t have too much weaknesses, but at some extent it can be argue why its not equipped with flash light with back camera or why it doesn’t support 8mp snapper.  Another thing people want in their device is storage it has 4 variants in terms of storage, but people have to pay more to get more storage whereas if they have putted the sd card slot in it people can transfer files easily from their pc to Ipad or Ipad to PC.

Opportunity

One of the biggest opportunity Ipad Air has is its A7 64bit chip with powerfull Gpu to play any game flawlessly in it.


Threats

The biggest threat to Ipad Air is its own Ipad Mini 2 which is launched by Apple and Samsung Galaxy Note 10.1 which is powered with might Snapdragon 800 processor with 3gb of Ram.

Ipad Air is expected to fall on shelves on 1st of November with bang.


How To Root & Unroot Sony Xperia Z, Z1, Z Ultra In Easy & Safe Way


Hello Fandroids, this is a step by step tutorial to show Rooting and Unrooting of Sony Xperia Z, Z1 & Z Ultra oall variants. This tutorial show you a safe method to root and unroot your Sony Xperia Z, Z1 & Z Ultra without a data loss and without harming your device unless you will do something wrong during following my instructions. Dont use rooting to pirate applications and games, only use it for productive work. I am showing you this tutorial,  because lot of people are worried about  Sony Xperia Z, Z1 & Z Ultra software keys and they want to hide them to take a full advantage of Sony Xperia Z, Z1 & Z Ultra display while playing games and watching movies on their Sony Xperia Z, Z1 & Z Ultra  . However rooting helps you to overclock  CPU speed  as well as many other things. But to keep it simple stay with the basics.

PLEASE NOTE:  IF YOU HAVE UPDATED YOUR DEVICE TO FIRMWARE (14.1.G.2.257) THIS METHOD IS NOT GOING TO WORK AND TO MAKE IT WORK YOU HAVE TO GO BACK TO PREVIOUS FIRMWARE.


Watch this video to know how to go back to stock: http://www.youtube.com/watch?v=j4gm9VeQCHA


 HOW TO ROOT 


Before starting rooting process you don't have to make a backup of your device because this will not wipe a data from your phone just simply follow below instruction to get root access on your phone. Lot of people think that rooting Z1 breaks it camera and they wouldn't able to use its camera after rooting. These rumors are pointless because its only going to break if you people will try to unlock bootloader and this rooting guide will not tell you how to unlock a boot loader so its a safe rooting guide for Z1.

STEP 1


Download a  VRoot Tool Kit to Root your 
Sony Xperia Z, Z1 & Z Ultra and install it on your PC from a below link 

http://cdnpic.mgyun.com/files/products/vRoot/2013/17235968/VRoot_1.7.0.3882_Setup.exe


STEP 2


Now you have to get in to your phone setting like a below picture (Pictures shown in rooting method is of LG G2 but you have to do the same things  to root your 
Sony Xperia Z, Z1 & Z Ultra because these devices can be easily rooted from vroot tool kit. So dont get hesitate by looking at the G2 pictures below you have to do same thing on your Sony Xperia Z, Z1 & Z Ultra.


Press About Phone  and you will see a window like a below picture 


Now here you have to hit Build Number may be 5 or 6 times repeatedly because it will give us developer options like below picture in settings


Now enter in to developer options and Enable USB Debugging like a Below Picture 


STEP 3:


Now open up a Vtool Kit  that you have installed in Step 1 in your PC and it will look like a below picture


Here all the things are written in Chinese, but dont get worried just simply connect your phone with your PC using a micro usb cable which comes up with the phone and you will see a window like below picture on your phone and you have to press ok here (some time it doesnt appear on Sony devices so dont get worried.


Vroot Kit will show you your Sony Xperia Z, Z1 & Z Ultra logo like a below picture in it when you press ok in your phone. It will take some time to show your phone logo because its going to install all the neccessary drivers into your pc or laptop. So dont panic unless your phone logo appears in vroot kit.


Now just simply click root and enjoy a full root on your device


Now once it rooted your  phone get restarted and you will see Super Su in your device like a below picture that means you have successfully rooted your Sony Xperia Z, Z1 & Z Ultra


So guys now you have super user installed on your device and you can download GMD Auto Hide Soft Keys from play store to hide your software keys like a below picture,you just have to grant access to super su once you open GMD and then you can easily hide your software keys. 


HOW TO UNROOT


Before starting a Unrooting process make sure you have made a full back up of your phone so you will not loose any data because unrooting will wipe all the things on your phone except you external sd card files.


STEP 1:

Download Sony Software Update Tool Kit from Sony site from a below Link and install it on your computer and it will look like a below picture on your pc when you open it 


Now here you have to tick I hereby accept the license agreement by reading out the 4 points written on this software make sure you read all these points before doing software upgrade and then press start and you will see a window like a below picture and here you have to pick your device 


Now after selecting your device simply press next and you will see a window like below picture 


Now here follow on screen instructions in this software and go back to factory settings on your phone to loose root. After resetting your device using this tool you will loose root and no longer traceable to any one :)


How To Root & Unroot Samsung Galaxy Note 3 All Variants In Easy & Safe Way


Hello Fandroid, this is a step by step tutorial to show Rooting and Unrooting of Samsung Galaxy Note 3 all variantThis tutorial show you a safe method to root and unroot your Note 3 all variants without a data loss and without harming your device unless you will do something wrong during following my instructions. Dont use rooting to pirate applications and games, only use it for productive work. However rooting helps you to overclock  CPU speed  as well as many other things. But to keep it simple stay with the basics.

To Root your Note 3 using this tutorial you need two things :


1. Samsung Kies: http://www.samsung.com/uk/support/usefulsoftware/KIES/JSP


Download a Samsung Kies from a Samsung Official Website directly to make sure you have correct drivers installed in your computer for your S4 I9500.


2. Download Odin Software and extract it using winrar :  http://www.putlocker.com/file/D3C9FD57F547AFFD


After downloading Odin 3 download Root software for installing root on your Note 3 All variants from a below links. Please make sure your are downloading a correct rooting tool kit for your Note 3 from a below link .


After downloading CF-Auto-Root for your Note 3, extract it using winrar and you will get 3 files like a below picture, but you have to ignore two odin files because we have already installed odin in our system


STEP 1:

Now once you have installed a Samsung Kies and open it with your Note 3 connected with your computer,  it will automatically detect your phone and install all the necessary hardware of your phone in your computer. When you connect your phone with your pc it will look like a below picture in Samsung Kies.


After doing this step, make sure you have closed down a Samsung Kies as well as you have disconnected your phone from computer.


STEP 2:


After installing drivers through Samsung Kies  you have to open Odin. Now from a ODIN Folder you have to press a third file which is Odin3 (Run as Administrator and make sure your phone is disconnected from computer). After opening it you will see a window like below picture.


After opening this Odin file you have to turn off your Note 3 by pressing power on and off key on your Note 3 until its get completely off. Once it gets completely off PRESS (POWER ON AND OFF KEY + HOME BUTTON + VOLUME DOWN KEY AT THE SAME TIME). This will get you in to a downloading mode like a below picture in your phone.


After getting in to a downloading mode you have to press a UP VOLUME KEY ON YOUR PHONE and you will see a window like below picture on your phone 


Now when you see a above window connect your Note 3 with your pc through micro usb lead and you will see a below picture like window on your PC


Here you can witness that Odin (Id-com) section has become blue in above picture. Now you have to press PDA in Odin and you have to search for a file CF-Auto-Root-hlte-hltexx-smn9005.tar.md5 (if you are on different variant than you will have something else instead of smn9005) which is in your downloaded CF-Auto folder.  Look at below picture to see how this file looks like


Now double tap on the file it will be added to Odin and press Start in Odin and leave your phone as it is. After starting a process you will see a window like below picture in your phone with downloading bar and then let process to go complete until your phone get restarted (make sure you dont touch your phone unless its restarted


In your PC you will see a picture like below in Odin


Green Box will be highlighted in Odin just above the blue box which illustrates that you have did all the things correct. After your phone restarted you will see Super User  in your mobile which means you have successfully rooted your phone :), like below picture 


Now you can transfer games to you External Sd card easily and as well as you can play them. If you dont know how to transfer games after rooting check out this Youtube Video made by me: 

                                                        
HOW TO UNROOT


Its very easy to Unroot Note 3 after rooting it. Make sure you have installed proper drivers by installing Kies on your PC. If you have followed my steps to root your device, you must have all the drivers installed by now. If you have not did rooting by looking at the above tutorial, then just have a quick go at Rooting process (Step 1). To unroot  your Note 3  you need three things which are going to take little bit longer than rooting your phone. 

1. Download a firmware  for Note 3 from sam mobile site: 

http://www.sammobile.com/firmwares/1/?model=SM-N9005&pcode=BTU#firmware

When you press the above link you will see a window like a below picture to download a S4 I9505 firmware.


This site needs registration, but registration is free and after that you can download a firmware. This file is going to take a little bit more time to download because file size is around 1.8 giga bytes. 

After downloading a file you have to extract it using a winrar and after extracting it you will find two files inside a folder like below picture


No here again you have to open Odin to unroot your device


3. After opening Odin we have to download a Triangle away      
    
    http://www.putlocker.com/file/4A773362F62903ED

After downloading Triangle Away,  install it on your mobile and it will look like a below picture in your phone.


After you have successfully installed Triangle away open it and you will see a msg like below picture in your phone.


Grant access to Super Su and  if it will ask you to follow you on twitter and facebook press no. Now here you have to press a Reset flash Counter and below picture like window will pop out, no worries nothing is going to happen to your mobile just press continue :). If in-case your phone stop responding after pressing continue then just hold power on and off key for 5 seconds so it can automatically get shut down otherwise you have to shut down your phone anyways. 


Now after shutting down your mobile Press Power On Key + Home Button + Down Volume key at the same time and you will see a  window like like below picture on your phone 


Now here you have to press Up Volume Key to continue and you will be entered in a window like below picture  


Now connect your phone with PC and open Odin in your PC (Run as Administrator) and Odin first box will go sky blue like a below picture, if you have successfully installed all the drivers. Make sure you have closed Samsung Kies in your PC.


Now press PDA  to find out your downloaded Note 3 Firmware which you have downloaded from Sam mobile (make sure you have extracted the file using winrar). Your firmware should be look like a below picture on your PC. Make sure only two things are ticked in Odin: Auto Reboot and F. Reset Time like a below picture when you add a firmware to ODIN.


Now press start and if Odin gives you a message dont responding like a below picture now worries because its going to respond after taking its time 


Now when its start responding you will see a below like picture on your Pc and Phone, dont touch anything now


After all the downloading process get complete you will see a picture like below in your PC and your phone will be restarted automatically.


Now you have to make a backup of your files  using Samsung Kies, so you will not loose your internal storage files, if you have saved all the things in your external sd card no worries. After making a backup, power off your phone and Press Power Key + Up Volume Key + Home Button at the same time and you will see a below like picture on your phone.


Now here from down volume key go to wipe data/ factory reset and press power button. Now you will see a below like picture 


Now use down volume key again and select Yes--delete user data by pressing power button
and  below picture like window comes up and here you have to press reboot system now by pressing power  key. Now reboot will take little bit longer because we are installing a firmware. Thats it you have successfully unrooted your device, claim your warranty or else sell your phone if you want to :). 


Video tutorial is going to available soon : https://www.youtube.com/watch?v=qfoYfSNqgkw